Beginning the Journey to your First Tune
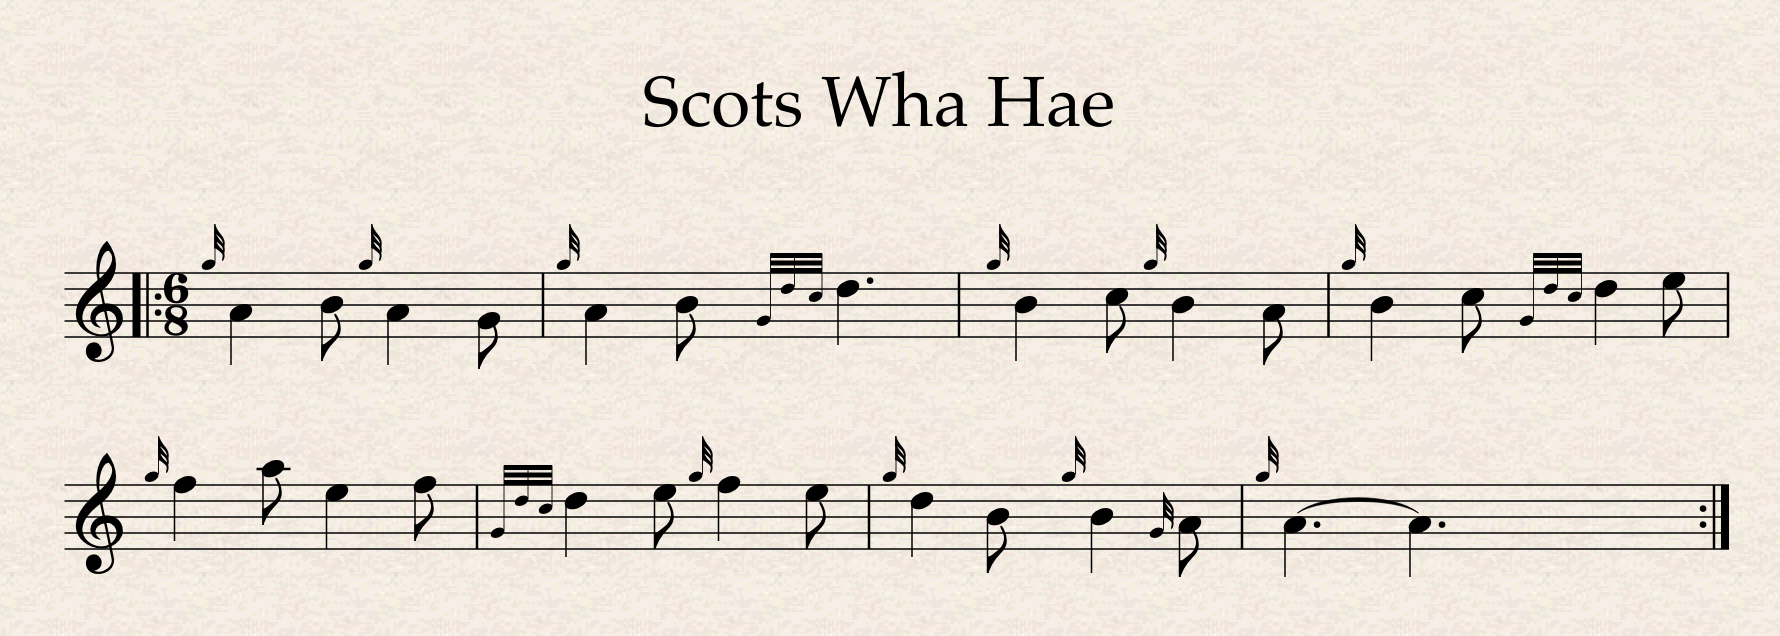
As discussed at 6:49
B then a low G gracenote on low A
Written in bar 7 as:
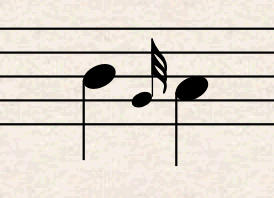
Played in bar 7 as:
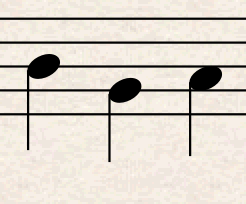
Recap.
Take as many breaths as you like, but always start on the note that you stop on.
Even though this is the first part of our first tune, focus on going from one note to another.
The correct technique going from one note to another, is the only important aspect here. It is not important to hear the tune, or to play fast. Think of this as a longer exercise.
Follow the instructions: order of events, off first on second, using the highest finger to avoid runs..
For reference, it is important to note that in one-on-one lessons the average time for students to arrive at this tune is 5-7 months.
This is a critical stage in your learning process so stay focused on the correct technique and it will allow you to produce great sounding music in the future.
We will play the first part of this two-part tune.
We can also think in phrases. A phrase is usually 2 bars long. It is the equivalent of a musical ‘sentence’. There are four phrases in this part of the tune so you can structure your practice goals by playing through one phrase at a time.
Lesson 13: First Tune
Topic: Applying Gracenotes, D Throw, and Finger Order in a Tune
Lesson Notes with Timestamps
0:00 – 1:16 Starting the Tune – First Phrase
Time signature: 6/8 (Scots)
Opening notes:
Low G → G gracenote
Up to A → B
Back to Low G → Low A (with G gracenote)
To B → D Throw (B → Low G → D gracenote on C → D)
Key Points:
Always use the order of events for gracenote: finger off → play note → replace finger
D Throw executed as practiced
1:16 – 2:02 Second Phrase
Similar rhythm as first phrase, shifted up by one note
Start from D (end of first phrase)
Sequence: D → G gracenote on B → C → G gracenote → Low A → D Throw
Order of events applied throughout
2:02 – 5:35 Upper Hand / Bottom Hand Transitions
High A → E: Off first, on second
High A → E → F → D Throw
E → D (G gracenote on D):
Step 1: Play note 1 (E)
Step 2: Lift gracenote finger (G)
Step 3: Play note 2 (D), keep gracenote finger off
Step 4: Replace G gracenote finger
Key principle: Correct order avoids extra/undesired notes
5:35 – 7:32 Pre-D Throw Preparations
B → Low G → Low A → G gracenote on Low A
Lead with pinky first when going down to Low G
Lead with B finger first when going up to B
Goal: Clean notes, speed comes later
7:32 – 8:48 Whole Tune Practice with Breath
Take breaths wherever necessary; don’t blow too long.
Prioritize finger order and accuracy over speed
Build muscle memory with slow, controlled playing
8:48 – 11:01 Handling Upper Notes / Avoiding Runs
High A → E → F → D throw / F → E
Tips to avoid extra notes:
Make thumb the last finger to go down in tricky transitions
Take time on short notes like Low G
Maintain order of events: off first → note → on second
11:01 – 13:18 Full Tune Run
Play through entire tune without stopping ( except to breathe)
Emphasis on:
Accurate gracenote execution
Clean D Throws
Smooth transitions between upper and lower notes
Breath management